Step into the enchanting world of crochet! This guide is your gentle companion to beginning your fiber journey, perfect for crafting cozy creations and finding tranquil moments. Discover the simple joys of transforming yarn into beautiful, handmade treasures, one stitch at a time.
The Ultimate Guide to Starting Your First Crochet Project: Weaving Warmth & Whimsy
Welcome, dear friend, to a delightful journey into the heartwarming world of crochet! If you've been dreaming of crafting your own cozy blankets, whimsical wearables, or charming home decor, but felt a little tangled by where to begin, you've found your gentle guide. Crochet isn't just about loops and hooks; it's about finding moments of peaceful creation, weaving your unique spirit into every stitch, and embracing the simple, comforting magic of handmade beauty.
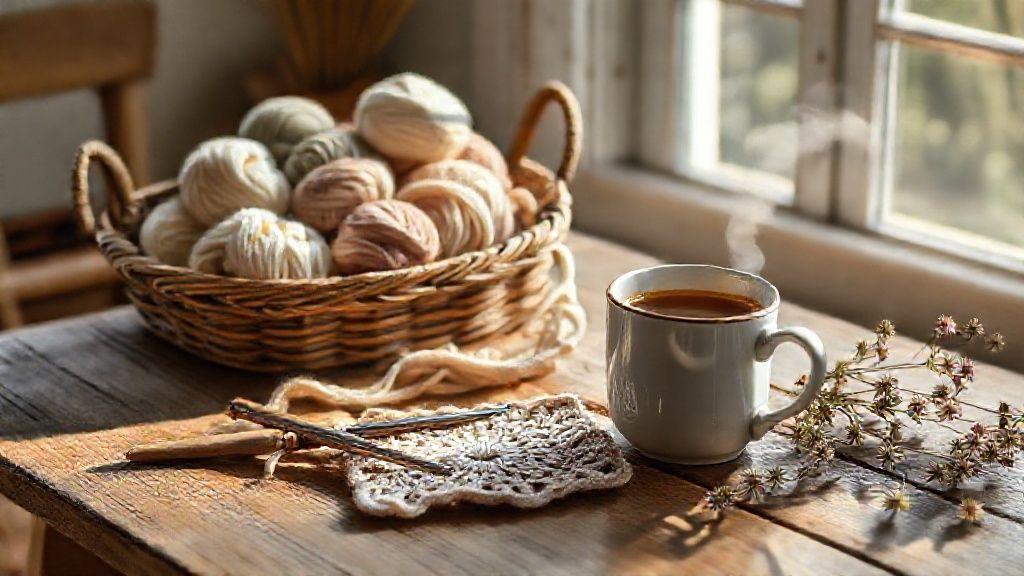
Imagine soft lamplight, a warm mug in hand, and the rhythmic click of a hook transforming a skein of yarn into something utterly lovely. That's the cottagecore charm of crochet, and it’s surprisingly easy to begin. Let's unspool this creative adventure together!
Why Crochet? More Than Just a Hobby
In a bustling world, crochet offers a tranquil haven. Beyond the satisfaction of creating something beautiful with your own hands, it provides:
- Mindful Relaxation: The repetitive motion of crochet can be incredibly meditative, melting away stress and promoting a sense of calm.
- Creative Expression: From choosing colors to designing patterns, every project is a canvas for your personal style.
- Cozy Comfort: Craft practical, warm items like scarves, blankets, and hats, or delicate pieces like doilies and amigurumi (stuffed toys).
- A Sense of Accomplishment: Watching your project grow, stitch by stitch, is wonderfully rewarding.
Gathering Your Cozy Kit: The Essential Tools for Beginners
Before we delve into stitches, let's gather your foundational treasures. Don't worry, you don't need much!
1. Yarn: Your Palette of Possibilities
For your first project, simplicity is key. Look for:
- Fiber Content: Acrylic yarn is highly recommended for beginners. It's affordable, widely available, easy to work with (it doesn't split easily), and forgiving if you need to "frog" (unravel) a few times. Cotton is also a good choice for dishcloths or sturdy items.
- Weight: Worsted weight (or Aran weight) yarn is perfect. It's medium thickness, making your stitches visible and easy to handle.
- Color: Choose a light-colored, solid yarn. Variegated or very dark yarns can make it difficult to see your stitches. Pick a color that makes your heart sing!
Tip: Check the yarn label! It will tell you the fiber, weight, and often recommended hook size.
2. Crochet Hooks: Your Magic Wand
Crochet hooks come in various sizes (indicated by letters or numbers) and materials.
- Material: Aluminum or plastic hooks are great for beginners – they're smooth and glide easily. Ergonomic hooks with softer grips can be very comfortable for extended crocheting.
- Size: The yarn label will suggest a hook size. For worsted weight yarn, a 5.0mm (H-8) or 5.5mm (I-9) hook is a fantastic starting point. It's comfortable to hold and easy to manipulate.
3. Essential Notions: Small Helpers, Big Impact
- Scissors: A sharp pair for snipping yarn tails.
- Yarn Needle (or Tapestry Needle): A blunt needle with a large eye, used for weaving in loose ends (no sharp point required!).
- Stitch Markers: Small clips or safety pins that help you keep track of stitches, especially in the round or at the beginning/end of rows. A lifesaver for beginners!
Understanding the Language of Crochet: Cracking the Code
Crochet patterns use a common language. Here are a few terms you'll encounter:
- Skein/Ball/Cake: Different ways yarn is packaged.
- Gauge: The number of stitches and rows per inch (or cm) for a specific pattern, using a specific hook and yarn. It ensures your project turns out the correct size. Don't worry too much about perfect gauge for your very first project.
- Abbreviations: Crochet patterns are full of them! We'll learn the most basic ones shortly.
Your First Stitches: The Magical Foundation
This is where the enchantment truly begins! Practice these foundational stitches until they feel comfortable. Don't fret if they're not perfect; consistency comes with gentle repetition.
1. The Slip Knot: The Beginning of Everything
This is how you attach the yarn to your hook.
- Form a loop with the yarn, ensuring the tail end is behind the working yarn (the yarn coming from the skein).
- Insert your hook into the loop from front to back.
- Catch the working yarn with your hook and pull it through the loop.
- Pull both the tail and working yarn to tighten the knot onto your hook, but not too tightly – your hook should still slide easily.
2. Holding Your Hook and Yarn: A Gentle Grip
Experiment to find what feels natural:
- Pencil Grip: Hold the hook like a pencil.
- Knife Grip: Hold the hook like a knife, overhand.
For the yarn, drape it over your non-dominant hand. The goal is to create consistent tension – not too tight, not too loose – allowing the hook to move smoothly.
3. The Chain Stitch (ch): The Building Block
The chain is the foundation of most crochet projects.
- Make a slip knot and place it on your hook.
- Yarn over (YO): Wrap the working yarn from back to front over your hook.
- Pull the hooked yarn through the loop on your hook. You've made one chain!
- Repeat to create a chain of desired length. Count the "V" shapes, not the slip knot.
4. Single Crochet (sc): Your First Textured Stitch
This is one of the most fundamental and versatile stitches. It creates a dense, sturdy fabric.
- Chain a few stitches (e.g., 10-15 chains).
- Insert your hook into the second chain from the hook. (The loop on your hook doesn't count as a chain).
- Yarn over.
- Pull the yarn through the chain stitch (you now have two loops on your hook).
- Yarn over again.
- Pull the yarn through both loops on your hook. You've made one single crochet!
- Repeat in each chain across the row.
- To start a new row: Chain 1 (this is your "turning chain," which doesn't count as a stitch) and turn your work. Now, work your sc stitches into the tops of the sc stitches from the previous row.
5. Double Crochet (dc): A Taller, Airier Stitch
The double crochet creates a taller, more open fabric than the single crochet.
- Chain a few stitches (e.g., 10-15 chains).
- Yarn over.
- Insert your hook into the fourth chain from the hook. (The 3 skipped chains count as your first double crochet).
- Yarn over.
- Pull the yarn through the chain stitch (you now have three loops on your hook).
- Yarn over.
- Pull through the first two loops on your hook (two loops remaining).
- Yarn over.
- Pull through the remaining two loops on your hook. You've made one double crochet!
- Repeat in each chain across the row.
- To start a new row: Chain 3 (this is your "turning chain," which counts as a stitch) and turn your work. Now, work your dc stitches into the tops of the dc stitches from the previous row, skipping the first dc beneath your turning chain.
Reading a Simple Pattern: Cracking the Code
Once you know the basic stitches, you can follow simple patterns!
- Materials: Lists the yarn, hook, and notions needed.
- Abbreviations: Often a key at the beginning explains pattern abbreviations.
- Gauge: May be included for size consistency (less critical for your very first project).
- Instructions: Broken down row by row or round by round.
ch: Chainsc: Single Crochetdc: Double Crochetsl st: Slip Stitch (used for joining or moving across stitches)st(s): Stitch(es)YO: Yarn Over[ ]or( ): Indicates a section to be repeated.*: Also indicates a section to be repeated.
Your Very First Project Ideas: Tiny Triumphs
Start with something small and achievable to build confidence!
- Simple Washcloth/Dishcloth: A rectangular swatch made entirely of single or double crochet. Perfect for practicing straight edges and consistent stitches.
- Coasters: Small squares or circles – a quick win!
- Basic Scarf: A long rectangle of single or double crochet. It’s forgiving and allows for lots of practice.
- Granny Square: A classic motif that introduces working in the round. There are many beginner-friendly tutorials for these.
Troubleshooting & Common Snags: Every Stitcher Faces Them
Don't be discouraged by little hiccups – they're part of the learning journey!
- Edges Wobbly? You might be adding or skipping stitches at the beginning or end of rows. Use stitch markers to mark your first and last stitch of each row.
- Too Tight/Loose? Adjust your tension. If it's too tight, try a larger hook. Too loose, try a smaller hook or simply try to hold the yarn with a bit more control.
- Can't See Stitches? Switch to a lighter colored yarn or ensure you have good lighting.
- "Frogging": It means to unravel your work ("rip it, rip it!") when you've made a mistake. It's perfectly normal and part of the process! Embrace it as an opportunity to learn.
Embracing the Journey: Weave Your Own Story
Crochet is a skill that blossoms with practice and patience. Don't aim for perfection on your first attempt; aim for joy and discovery.
- Practice Consistently: Even 15 minutes a day can make a big difference.
- Watch Tutorials: Videos can be incredibly helpful for visualizing stitches.
- Join a Community: Online groups or local craft circles offer support and inspiration.
- Let Your Creativity Flow: Once you're comfortable with the basics, feel free to experiment with colors, textures, and patterns.
May your hook always find its way, and your yarn always lead to cozy wonders. Happy crocheting, dear friend! Your cottagecore dreams are just a stitch away.